What’s not to like about LMMS?
It’s a free and open source digital audio workstation.
It works on all major operating systems.
It’s easy to learn.
And it’s also ranked very highly on our list of the best free beat making software.
In this LMMS tutorial, we’ll break down the essentials for how to use LMMS to make beats.
The Interface
The LMMS workflow is similar to FL Studio.
It has a modular interface, and all the work takes place in different windows.
Starting at the top left is the project menu.
This is where you can open, save and export your projects.
Below the project menu is the view menu.
This is where you can find all the main windows you need to create your beat.
The view menu consists of the Song Editor, the Beat+Bassline Editor, the Piano Roll, the Automation Editor, the FX Mixer and Project Notes.
In the middle is the transport section.
This is where you can play/pause your project, view your system resources, and update your project’s tempo.
On the left side of the interface is the media browser.
The media browser stores your virtual instruments, samples, projects, presets, and files on your computer.
To import audio elements to your project, you can drag them into the Song editor or Beat+Bassline Editor.
Song Editor
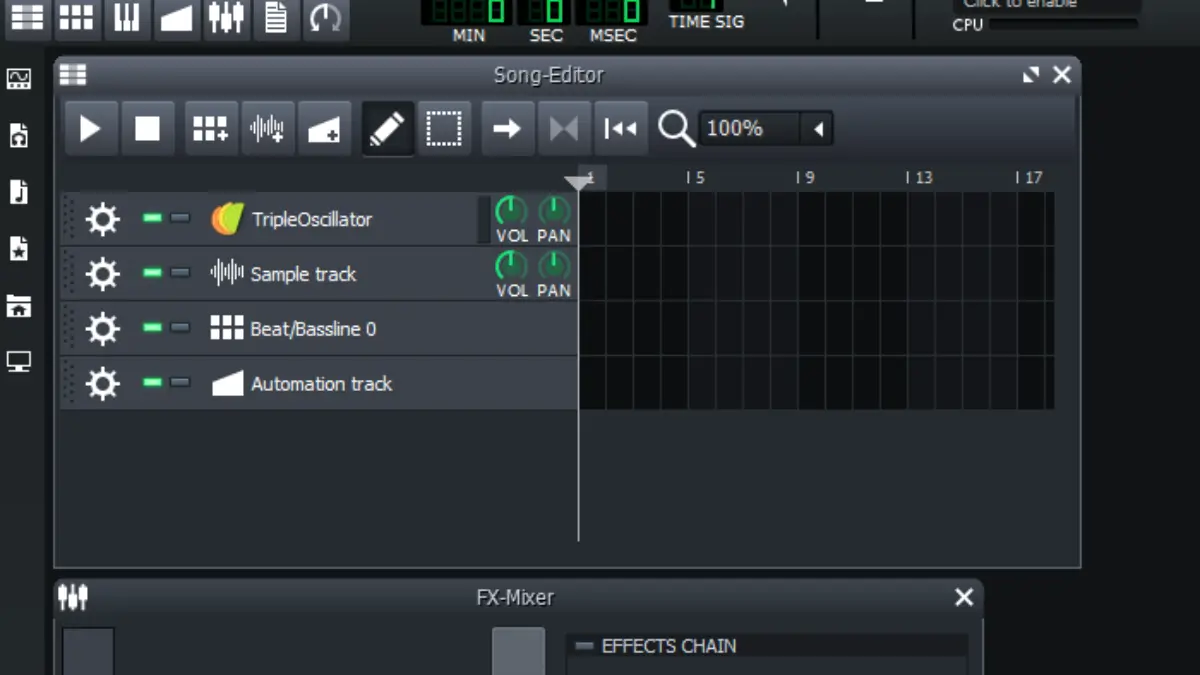
The Song editor is the core section of LMMS.
It stores your entire audio project, including your audio samples, drum beats, virtual instruments, sound effects and automations.
Once you add an element to the Song editor, it will create a new track.
For each track in the Song editor, you can adjust its settings by clicking its name.
You can also use the Song editor to adjust a track’s audio properties. For example, you can mute or solo a track, and adjust its volume and pan, without using the mixer.
The song editor adapts to the track type you’re using.
For example, when editing a virtual instrument, you will get settings unique to that instrument.
Let’s take a closer look at virtual instruments:
Virtual Instruments
LMMS comes with some basic virtual instruments that can be found in the media browser.
To add a new virtual instrument to your project, open the Instrument Plugins tab in your media browser, and drag one of the options to the Song Editor window.
Once you’ve added a virtual instrument to the Song editor, you will be able to input MIDI notes directly into the timeline.
You can also customize your virtual instrument by clicking on its name in the track list. A window will open with various settings to adjust the sound of the instrument.
Virtual instruments can also be further customized with effects plugins in the mixer (which we’ll cover later).
To make the most of your virtual instruments, you’ll want to use the Piano Roll to compose your chord progressions and melodies.
Piano Roll

Once you’ve added an instrument to the Song Editor, you can double click a note in the timeline to open the Piano Roll.
The Piano Roll in LMMS features a graphical representation of a piano, and a grid interface that represents the time signature of your project.
To compose your music, use the Pencil tool to place notes on the grid.
You can access more tools in the top menu to select, remove and pitch bend notes in the Piano Roll.
For realism, you can even change the note velocity at the bottom of the Piano Roll window.
Any changes you make to the notes in the Piano Roll will be updated in the Song Editor.
Beat+Bassline Editor
Besides virtual instruments, you can also create drum tracks using the Beat+Bassline Editor.
The Beat+Bassline Editor is a step sequencer that creates patterns in the Song Editor.
To add a new instance of the Beat+Bassline Editor to your track list, drag the module from the media browser into the Song Editor.
The Beat+Bassline Editor window will open without any samples.
You can then drag and drop samples from the Samples tab into the Beat+Bassline editor to add new sounds to the step sequencer.
Each block represents a step in the sequence, and clicking on a block will trigger a sample to play for that beat.
The default sequence will be four bars of four beats, but you can add more bars when necessary.
You can also loop the playback of your sequence by clicking on the loop button in the menu bar.
This will create a highlighted area above the sequence to indicate that section as a loop.
The Beat+Bassline Editor is great for quickly sketching out simple patterns, but sometimes you’ll need to make further customizations.
You can use the Piano Roll to fine-tune your patterns.
Just right click on a step in the sequence to open it in the Piano Roll. This allows you to slice notes and arrange them freely on the timeline.
At this point, you should have drum patterns, chord progressions and melodies.
Now it’s time to add variation and movement to your sounds using automations.
Automation Editor
Automations are like instructions for your project.
You would use Automation tracks to change specific parameters of any audio property or effect.
For example, you can create automatic volume fades using automation tracks.
To create a new automation track, click the Add Automation Track menu button in the Song Editor.
The Automation Editor will open in a new window with a familiar interface. The grid represents the track timeline in the Song Editor.
Inside the Automation Editor, you can left-click anywhere in the grid to insert a new automation point.
This will set the parameter to the desired level at that specific time.
At this point, the automation track isn’t controlling anything…
You’ll want to connect the automation track to a parameter.
To map the automation track to a parameter, open the window with the parameter that you want to automate.
Then, while holding the control (ctrl) key on your keyboard, click and drag the slider or knob to the Automation track in the Song Editor.
This will connect the parameter to the Automation track, and the changes will update as you change the automation points in the editor.
To make the most of the Automation Editor, you’ll need to add effects to your tracks using the FX Mixer.
FX Mixer
The FX Mixer controls the master volume and the audio settings for each channel in your project.
When you create a new project, all your tracks will be assigned to the master channel, and any changes you apply in the mixer will apply to the entire project.
However, it’s a good practice to map your instrument and drum tracks to different channels. That way you can adjust their settings separately.
To open the FX Mixer, click the FX Mixer button in the menu, or use the F9 key on Windows.
To add a new channel, click the plus button along the right side of the FX Mixer.
You can then map individual tracks to your newly created channels from the Song Editor.
To add effects to a channel, select the channel by clicking on it in the FX Mixer. Then click on the Add effect button in the bottom right corner of the window.
A new window will open with a list of available effects. You can search the effects library and choose the one you want.
Once you’ve added an effect to a channel, it will appear in the effects chain in the FX Mixer.
Now you can change specific effect parameters, automate them in the Automation Editor, and make your final adjustments.
Once you’ve completed your mix in the FX Mixer, it’s time to export your project.
Exporting
To compile your song into a playable file on your computer, you’ll need to export your project.
Here’s how to export your project in LMMS:
First, navigate to the File menu and select Export.
A new window will open with your computer’s file browser, and you can choose where to save your exported WAV file.
You can also export your project to MIDI by navigating to the File menu and selecting Export MIDI.
Then you can choose where on your computer you want to save your completed music project.