Chopping samples is essential to making Hip-Hop beats. But with most sampling plugins, it takes a lot of time to slice them…
In this article, I’ll show you how Serato Sample can help you flip samples in less time with its unique features.
Keep reading to find out if it’s the right sample chopping plugin for you.
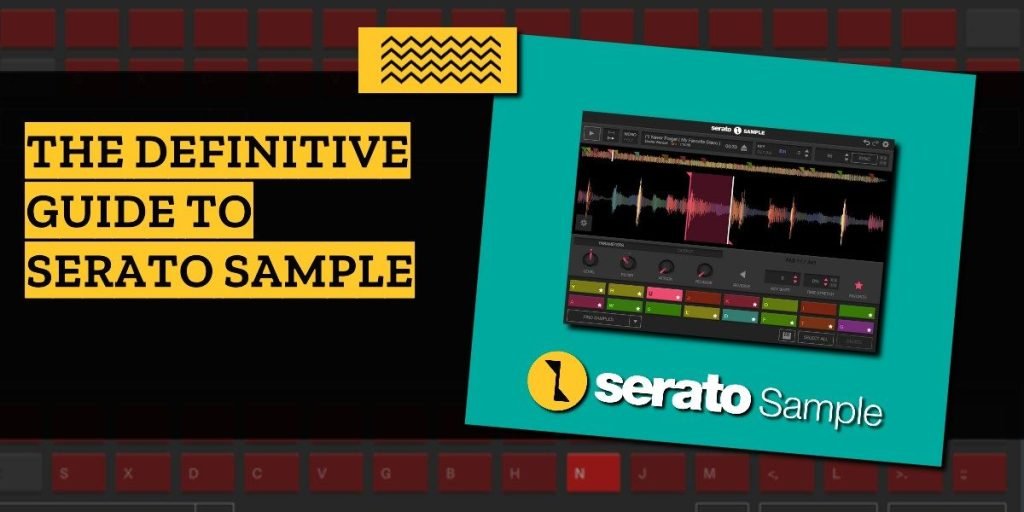
What does Serato Sample do?
Serato Sample chops samples quickly.
Even beginners can get started in as little as 30 seconds.
How is that even possible?
It’s all thanks to its intuitive workflow.
Here’s an example:
Let’s say you’ve got a 5-minute record you want to chop.
It usually takes forever to hunt through an entire song and slice each sample…
But Sample makes it easy.
With the click of a button, you can instantly map your pad with 32 slices.
Then, while auditioning each pad, you can lock in your favorites, and restart the process to find more samples.
Yes, I know. Sounds too good to be true…
But behind the scenes, Sample uses powerful technology to make this a reality.
Let’s take a look at some of these features in depth…
1. Tempo Detection and Syncing
The process begins with Sample’s automatic tempo detection.
All you have to do is load an audio file, and the software will analyze it to detect its tempo.
But that’s not all…
It then syncs the tempo of the audio to your entire project, so you don’t have to worry about manually keeping it in sync.
This is a huge advantage over its competitors. Most samplers require you to manually set the tempo of audio files.
But what about the accuracy of the tempo detection?
Lucky for us, there’s no need to worry about accuracy.
Sample uses the same Pitch ‘n Time algorithm as Serato DJ. It’s the most accurate tempo-detecting sampler in the market.
And here’s the best part…
Whenever you change the tempo of your host, the software will automatically match the tempo of the audio.
So you never have to worry about your samples being out of sync with your project.
And thanks to Serato’s performant algorithm…
Any changes you make to the tempo of your audio will have minimal impact on its sound quality.
2. Time Stretch Samples
Sample also allows you to manually change the tempo of your samples.
You can slow down or speed up the audio of the entire instrument, or any individual pad, without affecting the others.
Any changes you make are non-destructive. You can easily return the audio to its original settings if you change your mind.
What’s great is that none of these changes affect the key or length of your audio, no matter how much you stretch it.
Now you don’t have to worry about experimenting with the tempo of your samples.
3. Key Detection and Key Shift Samples
Sample also includes flawless key detection.
Once you load an audio file, it automatically identifies the original key.
You can change the key of the entire instrument, or adjust the pitch of individual pads.
The Pitch ‘n Time algorithm ensures that any changes you make don’t affect the tempo of your samples.
There’s even an option to create a chromatic instrument based on a single sample.
All you have to do is set a cue point and toggle Keyboard Mode. Sample will fill each pad with a pitched copy.
This is a fast and easy way to create a new instrument from scratch.
4. Automatic Chopping
The sampling shortcuts don’t stop there…
Sample takes this efficiency to another level with its automatic chopping ability.
Find Samples
The software can search for the best slices automatically using the Find Samples option.
It will map all the available pads with unique slices.
Then you can go through the pads and fine-tune each cue point to get everything just right.
Of course, this option isn’t perfect. Sometimes it will find bad samples.
But overall, it removes the pressure of starting from a blank slate.
Set Slicer
You can also slice audio based on its tempo using the Set Slicer option.
The software will create up to 32 slices for each beat of music.
You can increase or decrease the size of the samples by specific note lengths.
This option is great for hip-hop producers who chop records.
Set Random
Sample even includes an option to create random slices.
Choose the Set Random option to fill your pads with randomly selected samples. You’ll have 32 chances to discover something interesting.
This comes in handy when you’re stuck, and the other options are not cutting it.
In my experience, the best way to use this feature is to start with your favorite slices. Then let the software help you experiment with new ones.
Sometimes you’ll encounter interesting slices that you never would’ve thought to use.
Will Sample work with my DAW?
According to Serato, the Sample plugin is officially supported on Ableton Live, FL Studio, Logic Pro and Maschine.
But even if you’re using a different DAW, as long as it supports AU/VST plugins, Sample should work with it, too.
How does Sample compare to other software samplers?
If you’re using any of the DAWs mentioned above, you’re probably already familiar with its stock sampler plugin.
And if we’re being honest… you’re probably disappointed with it.
The main benefit of Serato Sample is its unparalleled sampling workflow.
Most sampler VSTs aren’t made with sample-based producers in mind.
Either they’re outdated, or they don’t support the features you need to make sample-based beats.
With Sample, you’re getting the very best sampling experience with the latest technology.
Let’s take a look at some specific comparisons…
Serato Sample vs Slicex
If you use FL Studio, then you either love or hate Slicex.
It’s a powerful audio editor that’s designed to sample drum loops.
Slicex has plenty of advanced audio editing features. But it’s insufficient for sampling long phrases of music.
Here’s why:
First, there’s no way to sync the tempo of your Slicex instrument with your FL Studio project.
Every time you change the tempo of the project, you have to update Slicex to match.
This is a workflow killer because it usually involves a lot of troubleshooting.
And here’s another issue:
Slicex is incapable of accurately detecting the tempo of your audio.
This means you have to calculate it manually, and apply the BPM to the file’s metadata.
Otherwise, the automatic chopping feature will give you terrible results.
But with Serato Sample, all of these issues are resolved as soon as you load the audio.
Serato Sample vs Ableton Sampler
Ableton Live’s Sampler is a sound designer’s dream.
But it’s a nightmare for producers who chop samples.
Why? Because Sampler has a different focus…
While Serato Sample is designed for slicing and sequencing, Sampler is best for creating multi-sampled instruments.
Ableton’s Sampler allows you to map one-shot samples to different notes, and customize their parameters.
But it lacks several critical features that sample choppers need.
For instance, it doesn’t support time-stretching, tempo syncing or audio slicing.
Instead, to get these results with Ableton’s Sampler, you need to edit your samples before importing them.
If this is your current Ableton workflow, Serato Sample is a significant upgrade.
Serato Sample vs Logic Sampler
Logic Pro’s Quick Sampler is a great tool for hip-hop production.
It allows you to automatically slice audio by transients or beat.
It even stretches your samples when you change the tempo of the project.
These are great features, especially for a stock plugin.
But in order to get the best results from Quick Sampler, you need to do some manual preparation beforehand.
For instance, you need to manually determine the tempo and trim your audio before adding it to Quick Sampler.
There’s also no key-detection available. So you need to manually find the key if you want to pitch your samples in the key of your project.
Overall, most Logic Pro users would be satisfied with the basic sampling capabilities of Logic Pro’s sampler.
But for easier chopping and key-shifting, I recommend upgrading to Serato’s sampler.
Serato Sample vs Maschine
Sampling with Maschine is fun.
It’s intuitive and bridges the gap between analog and digital.
But when it comes to getting the best results fast, it doesn’t compare to Serato Sample.
Here’s why:
Maschine’s sample module doesn’t automatically detect the tempo of your samples.
Instead, if you want to slice music based on its tempo, you have to manually input the BPM for the most accuracy.
Also, when changing the pitch of your samples, Maschine doesn’t automatically stretch the sample to maintain its tempo.
This causes the sample to shorten or lengthen, depending on whether you increase or decrease the pitch.
In all fairness to Maschine, it has two advantages over Serato Sample:
- It has a hardware component
- It has multiple sample banks for storing samples, so you have access to more sounds.
Overall, Maschine is best for chopping drum samples, or manually slicing in real-time.
But when it comes to slicing music and loops, it doesn’t quite measure up to Sample.
Serato Sample vs Serato Studio
Did you know that most of the same features in Sample are also available in Serato Studio?
Studio is the latest software from Serato that features its own sampler.
The obvious difference between Sample and Studio is this:
Sample is a separate plugin that focuses on sampling. You can use it with other DAWs as a virtual instrument.
But Studio is a full-featured DAW. You can make entire beats from start to finish with Studio alone.
When it comes to sampling, they both share the same features, including the Pitch ‘n Time sampling algorithm.
The only difference is that Studio supports just 8 pads, and Sample supports up to 32 pads.
Based on that alone, I’d give Sample a slight edge over Studio when it comes to sampling.
How much does Serato Sample cost?
Sample is a paid plugin that currently costs USD$99. Click here for the lowest price on Plugin Boutique.
You can also try Serato Sample for free if you sign up for a trial on Serato’s website.
Is Serato Sample worthwhile?
Overall, considering the powerful features mentioned in this post, Serato Sample is the best all-around sampler plugin for producers who make sample-based beats.
But ultimately, it comes down to personal preference.
If you’re not sure whether you should buy it or not, here are some other things to consider:
1. What style of music do you make?
If you don’t rely on sample chopping to make beats, then maybe you should consider a different sampler.
For instance, you can get a synth-based sampler that allows you to combine samples and synths.
Or you can get a sample player that supports a sample library, like Kontakt or Arcade. This would be an ideal choice if you rely on life-like instrument samples for your production.
Serato Sample is better suited for producers who chop music or loops, and sequence samples on a regular basis.
2. Which DAW do you currently use?
If you use Ableton Live, FL Studio, Logic Pro or Maschine, and you want to upgrade your sampler, then getting Serato Sample is worthwhile.
It will help you chop samples in record time, especially if you’re already familiar with the surrounding tools in your DAW.
But if you’re currently using an unsupported DAW, or free beat making software, then maybe you should consider getting Serato Studio instead.
With Serato Studio, you’ll get the same features as Serato Sample, along with the ability to create entire beats from scratch.
This would allow you to get all the features you need in a single tool.
3. Do you want to flip samples faster?
The biggest reason you should consider Serato Sample is this:
It takes just 30 seconds to chop samples.
Whether you’re an absolute beginner, or a seasoned sampler, Sample will save you time.
You won’t need to manually slice your samples – unless you want to.
And key-shifting and time-stretching is a breeze.
No matter your experience, Sample will streamline your workflow.